Manage or Add Resources
Resources can be made available for the attendees in the form of PDF documents, Videos and Web links.
Resources will come in handy to give our information to attendees at exhibitor booths, resource centers, auditoriums, and many other places.
Adding a resource:
The best way to upload the resources is by visiting ‘Resource Gallery’ and uploading all your resources at once and using it wherever needed.
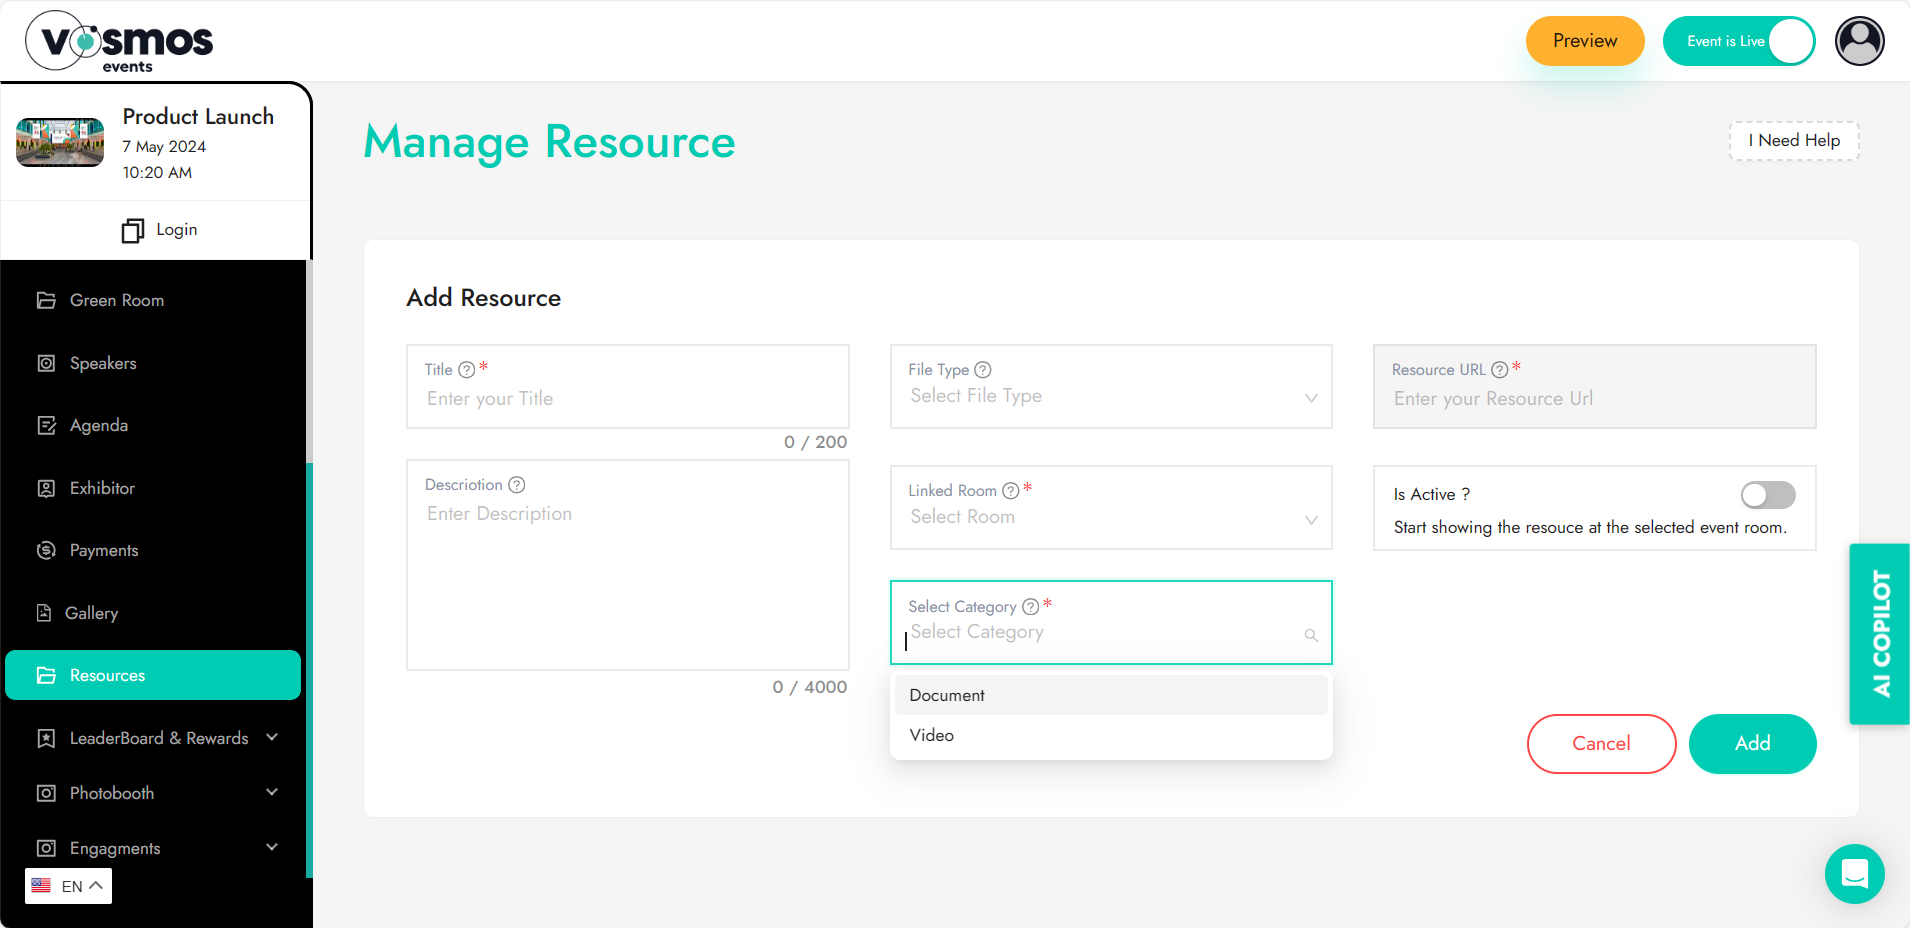
Details needed to upload a resource:
- Title: Name of the resource
- Linked Room: Tag the room where this resource needs to be shown.
- File Type: Type of the file. Types supported are, Document in PDF format, Video as YouTube, and Vimeo embedded URL & Web link.
- Resource URL: If you select Video/Web link as file format, you will have to update the URL here.
- Description: The long description of the file uploaded.
- Is Active: You can enable or disable this to show or hide the resources.
When adding a resource to the ‘Resource Center’ type of room, you will see an option called ‘Category’ you can choose between the default categories i.e., Documents, Videos & Web Links or also make new categories that will bifurcate the documents into those categories for the attendees.
Tip: If you want to share the presentation made by the speaker with the audience after the presentation is done, you pre-upload the resources and keep it inactive until the presentation is done. Once the session is over, you can make it active so that the attendees can download it.
Must know: Once the resources are added to respective rooms, it is important to go to ‘rooms’ and enable ‘resource center’ under lobby icons. This is applicable for all rooms except ‘Resource Center’
PDF file size cannot be above 10MB.

